Last Steps of Winemaking!
Your wine has hopefully been cleared and tweaked to your liking. It’s time to get it out of the carboy and into bottles! Sorry, this is a long one, but I did not want to break it up into another part.
Bottles, Corks, and Corkers
For a long-lasting product, I highly recommend bottling wine in regular wine bottles and corking them. I know some people like to keep their wine in gallon jugs, but if you aren’t going to be drinking all that wine in one sitting, like at a party, it won’t last in the jug because as wine is poured out, oxygen is getting in, and will oxidize your wine. If you’ve ever left a bottle of wine half-full and returned to find vinegar or plummy tasting wine, that is oxidation, and it doesn’t taste good. Also, some of my customers know they will drink their wine pretty quickly, so they use tasting corks. Again, those are good for the short term but don’t provide the seal of regular corks.
Bottles
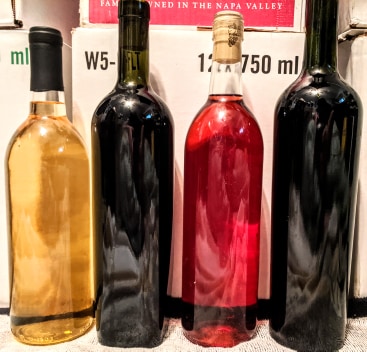
You can use any wine bottle you like, new, used, threaded, or not threaded. If you use threaded bottles, I’d recommend capping them with a screw cap rather than corking because sometimes they don’t cork correctly. When it comes to color, usually red wine goes in green bottles, and white wine goes in clear bottles, but if you keep your bottled wine out of the light, you can use whatever color bottle you want. The bottle size is completely a personal preference, the standard is 750mL, but there are 375mL and 1.5L. Again, when using bigger sized bottles, like the 1.5L, be cognizant that leftover wine in the bottle may oxidize if not drunk in time.
Corks
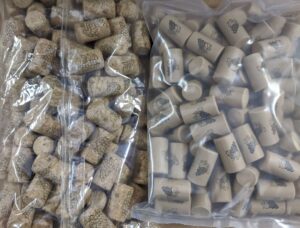
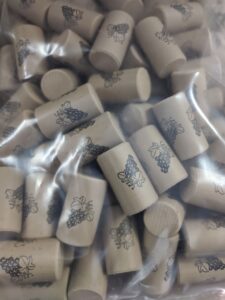
The standard cork size for most bottles is 9 X 1 ½. Some people prefer a longer cork, 9 X 1 ¾, which I do recommend. They provide extra security against oxygen seeping in if you’re going to be aging your wine in the bottle for over a year. I’ve also heard that the number nine corks are too big for some bottles, so people go with number eight corks rather than nines. You can probably get pure cork, but most corks are composite or synthetic. I like synthetic corks because they don’t need to be kept wet and protect against cork taint, which can eat away at corks, leaving gaps for oxygen and other things to creep in, and can cause undesirable flavors and odors in your wine.
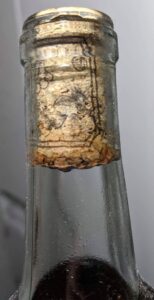
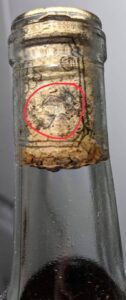
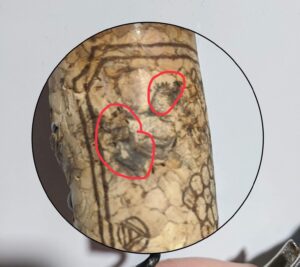
(Cork taint on the cork. How to identify it in the bottle, and what it looks like out of the bottle)
I’ve only experienced cork taint in bottles of wine older than five years, and they usually have turned to vinegar. The above images are from ten-year-old wine.
The only downside to synthetic corks, other than the price compared to composite corks, is that they are hard to put in with a double lever corker. If you want to use synthetic corks, for best results, I recommend a corker that squeezes the cork rather than the forcing cone of the double lever corker; the synthetic corks don’t have as much give as regular corks.
Tip: to soften your corks to make them a little more malleable when corking, soak them in warm water for 15 minutes. Don’t boil or simmer corks; the glue may become soft in composite corks, and synthetic corks may scorch.
Sanitize the corks before bottling! Use Star San or metabisulphite solution to sanitize your corks. I fill a bowl with Star San and let the corks float in it while I’m transferring my wine. Two minute contact time with a sanitizer is all you need.
Corkers
There are many corkers to choose from, varying in usability and price! I definitely recommend buying the corker you think you can or want to use. Take into consideration how many bottles you’ll be corking and if this will be a long term hobby; will you get your money’s worth from this corker? If you buy/bought an equipment kit, it may have a corker in it.
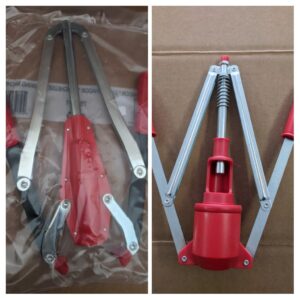
Double Lever
These force the cork into the bottle using the leverage of two levers, and are pretty easy to use. These usually have something that grasps the neck of the bottle to steady it.
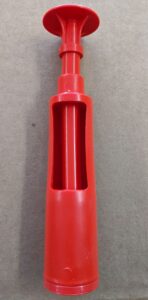
Plunger Corker
This is a less expensive option than the double lever corkers. It has a cone with a plunger that pushes the corks through the bottom of the cone. Instead of leverage with levers, you use your hand to plunge the cork into the bottle. There isn’t anything on this corker to grasp the bottle, so you may need someone to hold the bottle for you.
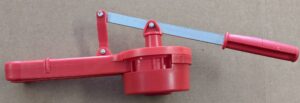
Compression Corker
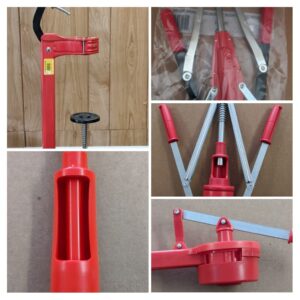
These corkers squeeze the cork in vice-like jaws, and a lever is used to push the cork into the bottle. There is a hand compression corker; it has two handles that squeeze the cork and a lever on top to push the cork into the bottle; this is a great stress reliever! Honestly, I find this one hard to use by myself. I need someone to steady the bottle since there isn’t anything grasping the bottle on this corker, either.
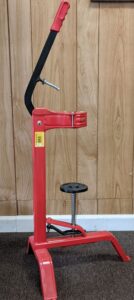
Then there is the floor corker, which I like to call the Ferrari of corkers and is my favorite. It has vice jaws that squeeze the cork and pushes it into the bottle in one pull of the lever. The rod that pushes the cork into the bottle can be adjusted if the cork is being pushed in too far or not far enough. There is a spring-loaded pedestal that the bottle sits on, and it adjusts for taller bottles. This corker is fabulous but pricey, going back to whether or not you’ll get your money’s worth out of your corker. Here at Means Cork and Cap, we actually rent this corker out for evening or weekend rentals. It’s great if you have a lot of wine to bottle, say for a party, or you’ve just been busy!
How many bottles will you get?
The rule of thumb for the number of bottles is usually five 750mL bottles per gallon. If you are like me and have a tough time racking and leave some wine behind with the sediment, it’s probably more like four or four and a half bottles per gallon. So, that’s twenty-four to twenty-five bottles per five gallons, and twenty-eight to thirty bottles per six gallons.
Preparing bottles
Do not put your bottles in the dishwasher! I know you want to take a shortcut and let your dishwasher sanitize your bottles, but think about the food particles and dishwasher soap residue in your dishwasher. Do you really want that in your wine? I know the food particles are technically clean, but they can still mold and ruin your wine. Some soaps can also be greasy or over fragrant and may leave unwanted appearances, odors, or flavors in your wine. Please keep kitchen and winemaking items separate!
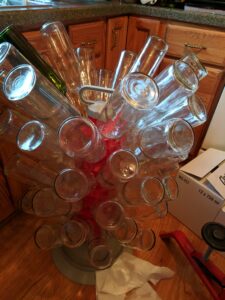
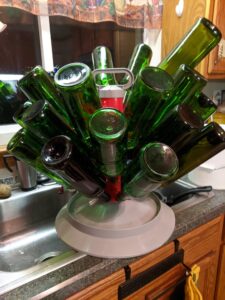
To prepare the bottles, soak them in five gallons of hot Easy Clean water. For used bottles, soak them for at least fifteen minutes; the Easy Clean will soak off labels and even mold from inside the bottles’ bottom. As someone who reuses wine and beer bottles, I’ve made it a habit of rinsing out the bottles well with warm water after they’re empty so I don’t have to clean out the mold later. Though Easy Clean will get the labels off, the glue is usually left behind, which will need to be scraped off. I use a Labelnator bottle blade, but a putty knife or any blade will work. Even though Easy Clean doesn’t need to be rinsed, because bits of label paper and possible mold are floating around, I use a bottle washer attached to the faucet to rinse the bottles, then place them on a bottle tree to drain.
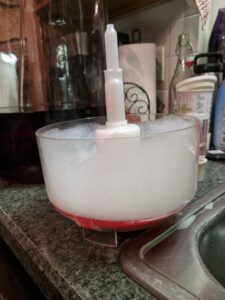
After cleaning the bottles, I sanitize them with Star San; you can also use metabisulphite. I put Star San water into a Vinator bottle rinser and squirt Star San in the bottles, then place them back on the bottle tree to drain. The Vinator will fit on the top of the bottle tree where the handle is. Also, Star San will foam up in the Vinator, so don’t be alarmed if that happens; the foam will sanitize as well. Remember, Star San needs two minute contact time to be effective in killing bacteria.
Bottling
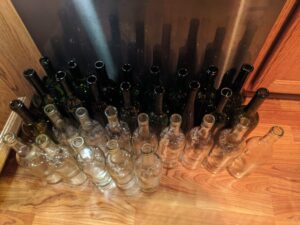
You can bottle your wine from the carboy, or if there is still sediment, I’d recommend siphoning into a clean, sanitized carboy or bucket to bottle from there. I place my carboy or bucket on a counter and line the bottles up on the floor beneath it, so I can easily go down the line of bottles to fill them.
Just a Hose
Use your siphon/racking cane and hose, or just the hose to bottle. Start a siphon, crimp or clamp it to stop the flow so you can put it in a bottle, fill, leaving enough space for a cork, crimp or clamp, then move to the next bottle and repeat. So I don’t have to crimp/clamp the hose and worry about leaving enough space, I use a bottle filler, aka bottling wand. There are two options, one with a spring and one without. The spring one comes in ⅜ inch or ½ inch depending on what size of hose you use; the ⅜ inch fits the standard 5/16 inch siphoning hose. I prefer the wand with the spring because it doesn’t get stuck and leak as often as the other.
Bottle Filler
Attach the bottling wand to the free end of the hose, put the wand into the bottle, push the tip on the bottom, fill until it’s to the top, almost overflowing, stop putting pressure on the tip of the wand, and the flow will be shut off. The wand gives you the proper headspace in any bottle for corks or caps. If you are using a racking cane or an auto-siphon with the bottling wand, you will probably have to start a siphon crimp/clamp the hose, attach the wand, then release and go. I don’t think the wand has enough draw to start a siphon on its own.
Bottling Bucket
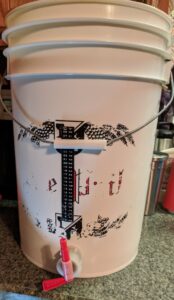
When I bottle, I like to use a pre-drilled bucket with a spigot. This, again, gives your wine one more siphon off of any remaining sediment; the spigot is more stable than a racking cane or auto-siphon while moving the hose from bottle to bottle, and it will start flowing when you open the spigot. A 5/16 inch siphon hose will fit on the end of the spigot, then attach the bottling wand to the other end, open the spigot and start bottling.
All By Myself
If I’m bottling without help, I may use a carboy wedge to get a slant on my bucket, so I don’t have to worry about the wine getting below the spigot, and I have to stand on my head to fill bottles and tilt the bucket at the same time. I also fill all the bottles, then cork, but they can be corked as you fill them if you have a helper.
Newly Bottled Wine needs to Express
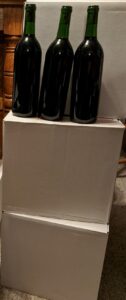
After filling the bottles, leave the bottles upright for at least twenty-four hours so any displaced air can escape around the cork; you may see and hear bubbles of air escaping around and through the cork, which is normal. If you use regular or composite corks, you should store your wine on its side, keeping the corks wet; this can either be on a rack or in a case placed on its side. Nomacorks, on the other hand, do not need to be kept wet so that you can store the bottles upright; I usually store mine stacked in their cases.
Let it Meld, Again
Whenever you bottle anything, it will go through a stage called bottle shock. Since the wine is going from a large container with higher volume to something much smaller, some flavors may be exaggerated, and the balance you had in the carboy may be nonexistent. This reminds me of the first time I made a Chardonnay, which is an oaked white wine. The oak isn’t supposed to be over the top; it’s just a nice way to round out the wine, a little kiss of oakiness. I was impatient and had to try the Chardonnay shortly after bottling, and the oak punched me in the face and was like I was chewing on mulch. After a few months, it mellowed, and the oak retreated to the background where it belonged.
So, the wine needs a little time to calm down and meld in the bottle before going back to what it was in the carboy. A general rule of thumb is red wines need three months, and white wines need one month of bottle time. You can drink young wine, but it will get better in time. It is fun to see how the wine changes over time, so you may want to try a bottle every so often.
Storage and Shelf Life
As mentioned above, depending on your corks, you can store wine on a wine rack or keep it in case. If you are going to store on a wine rack, make sure it is not in direct sunlight or even under fluorescent lights, and the temperature is consistent. Cooler temperatures are better for storage, so if you have a cool basement, that’s probably the best place to store your wine.
If you keep your wine at a consistent temperature, out of light, and the cork wet, if it isn’t a synthetic cork, it can last for a few years, especially if you added metabisulphite before bottling. From experience, I’d say drink your homemade wine within five years. Of course, you can always keep a bottle or two to age to see how it is after many years, but definitely drink the bulk of it within five years. I just dumped three cases of ten-year-old apple and pear wine that was badly oxidized, and the corks were starting to taint, which probably would have resulted in vinegar if left to deteriorate the corks.
Dumping wine is never fun, and after all of that hard work, you deserve to have successful, tasty wine!
I hope you have enjoyed this winemaking guide, and it has answered some of your questions; I definitely enjoyed writing it. Thank you for reading. Cheers!
Caitlin

