Preparing your Fruit for Fermentation
So, you have figured out how much wine you want to make, and have gathered the necessary equipment to start making a batch, where do you go from here? In this part of the fruit winemaking guide, I will be talking about how to get your fruit ready for fermentation. This part was supposed to include additives and testing, but I don’t want this to be too long winded, so those will be in their own part.
Find a Recipe!

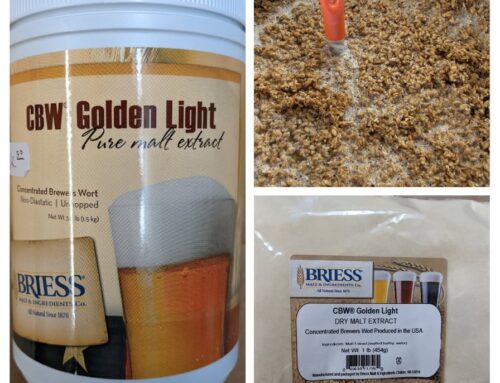
With the fruit you want to ferment in mind, I recommend finding a recipe of that fruit wine. A recipe is a good guideline for how much fruit, water, sugar, and other additives you’ll need at least per gallon, if not for your exact batch size. Personally, I like the “Winemaker’s Recipe Handbook” because it has many one gallon recipes to choose from, which are easily multiplied to be a larger batch, and there is a list of ingredients, (fruit, water, sugar, and additives) along with comprehensive instructions of what to do from start to finish. But, you can always turn to the internet to find a recipe, many of which have a more “natural” approach, like using lemons and raisins for acid and tannin (see additives post).
In your search for a recipe you may find that there are different ways to prepare your fruit for fermenting, but before I can discuss that, I must talk about cleaning, again.
If you are using fresh fruit, especially fruit that has been picked recently, it most likely has dirt, pollen, and possibly bugs on it. Those do not make good wine.
Cleaning your Fruit
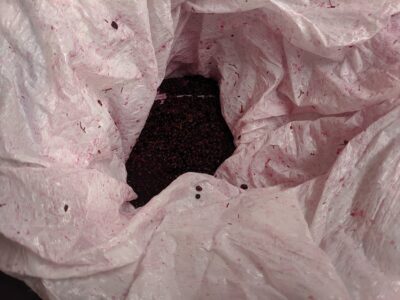
Nine pounds of frozen elderberries being stemmed. I wish we had taken the stems off prior to freezing!
Before cleaning, make sure you’ve gotten any stems, twigs, and leaves off your fruit. To clean the fruit, I would recommend a non-soap option since suds can be hard to rinse off, and I don’t think you want soapy wine. The last time I made fresh fruit wine, peach, I used a water-vinegar solution of three parts water to one part vinegar, and let the peaches soak in it for fifteen minutes, moving them around to knock the dirt and any bugs off, then rinsed the peaches well with clean water. I wouldn’t usually use vinegar anywhere near winemaking because the acetic acid in vinegar can infect your wine, but since the vinegar is diluted in water, doesn’t get sudsy, cleans dirt and kills bugs on fruit, and most importantly you’re going to be treating the fruit with potassium metabisulphite (see additives post), I have to recommend water and vinegar as a cleaning option for fresh fruit. Make sure to rinse the fruit really well with clean water after soaking it in the vinegar, though, especially to get any clinging dirt off. I would not use vinegar to clean your equipment, though, because it may get trapped in tiny crevices or holes in the surface of your equipment and infect your wine that way.
Preparing your Fruit
After you’ve cleaned your fruit, if you haven’t already thought about it, you can decide how you want to ferment it. There are multiple ways to prepare your fruit for fermentation, some are to keep it intact, juice it, freeze it, or heat it.
Keep it Intact
This is what is called fermenting on the fruit. For fruit with seeds/pits, halve them and remove the seeds/pits and put the fruit in your fermenter (bucket, refer back to the equipment post) to ferment. I’d put the fruit into a bag, either a one-time use muslin bag, or a reusable nylon bag so it’s easier to clean the fruit out. Some recipes suggest squishing the juice out of the fruit and leaving the pulp in the bag. If your recipe says to add water and sugar, the sugar will help with juice production, like when you put sugar on strawberries for strawberry shortcake, yum.
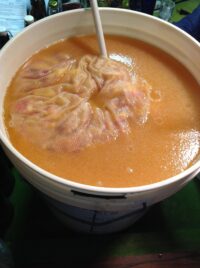
Peach wine, fermented on the fruit in a nylon straining bag.
Juice it
If you don’t want to have whole fruit floating around in your wine that you’ll have to remove later in the process, you can always juice the fruit and ferment the juice. This will require more fruit if you want to ferment only juice, or you can always add water/other juice to get to the volume you want to make.
Freeze it
Freezing the fruit and then fermenting it later is a great option! I know that sometimes after doing all the work of picking, cleaning, and seeding/pitting the fruit you may not have the time or want to start a batch of wine right away. If it’s larger fruit, like apples or peaches, you can cut it up, then put it into a freezer bag, whereas small berries can be kept whole. When you want to start your wine, get the fruit out, and let it thaw to room temperature before adding water, sugar, and other additives. You can ferment the frozen fruit whole, and follow the same steps as fermenting on the whole fruit, or you can always heat it to get the juice or make a puree to ferment. Freezing fruit actually helps with juice and flavor yield of fruit because as the fruit freezes, the cell walls burst, so as it thaws and comes up to room temperature, juice is more readily available.
Heat it
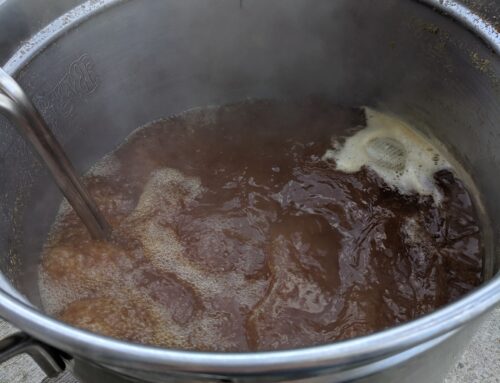
Heating the fruit has a few purposes. It sanitizes the fruit, so you won’t have to treat it with potassium metabisulphite (see additives post). It also releases the juice, which can be fermented by itself, and/or concentrates the fruit into a puree that can be fermented in water, or with the juice produced when heating. Again, if you don’t want to add water to get the volume you want, you will need a lot more fruit than recipes suggest for fermenting on the whole fruit. For reference, I recently made elderberry wine from a wine base, but had nine pounds of frozen elderberries I heated, and only got a gallon of juice, so it takes a lot of fruit to get more than a gallon to ferment.
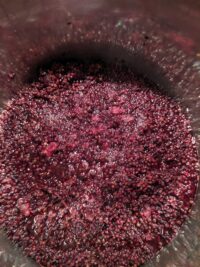
Heating the elderberries to release the juice!
You’ve cleaned your fruit, prepared it the way you want to ferment it, and added water and sugar. You are almost ready to start fermenting, but there are a few more things you may want to add/do to the fruit before pitching the yeast. Check back for the next post, Additives and Testing. I wish I could have included those here, but I was getting too long winded.
Caitlin