Brew Day!
You have all the equipment you need and have chosen a recipe you want to brew, but how do you do it? In this part, I’m going to discuss the brewing process, focusing on malt extract brewing!
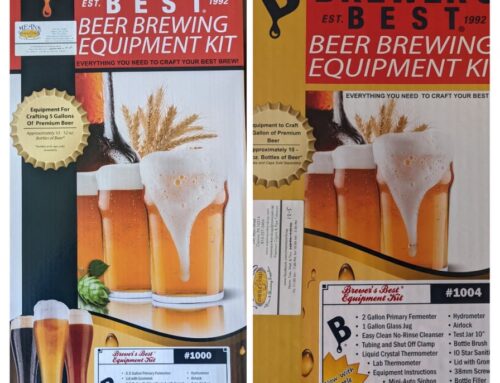
Boiling Setup
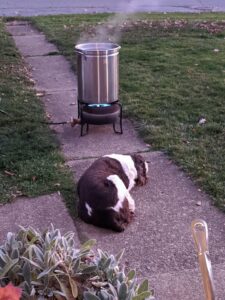
Brew dogs are highly recommended!
To brew beer, you need to be able to have a consistent, rolling boil over at least sixty minutes. You can brew on your kitchen stove, but be aware that boil-overs are something that can happen when adding malt and hop additions. Also, you definitely want to be able to see into your pot, so if you have a tall boiling pot and a microwave over your stove, you may want to rethink where you brew. You can use a propane burner or electric heating plate; I use the Brewer’s Best Element burner, and brew outside.
Just a PSA, when hops are added to the brew it can smell a bit funky, so brewing in your house may not be something you want to do for that reason. The more you brew and start to appreciate the process, the smell becomes a welcoming factor of brewing, and is delicious.
How Much Water?
Volume of your boil is also dependent on the size of your pot, and your batch size. If you have a ten gallon pot, you can do a full boil, meaning you boil the whole batch volume, whether that is five or six gallons. If you only have a five gallon pot, you’ll want to boil half the batch volume, two and a half or three gallons.* That’s mainly so you have room for a rolling boil and don’t risk a boil-over. At the end of the boil, if you are below volume, or boiled at half volume, you can top up to five or six gallons with cool, clean water. Cool water will help bring your wort (unfermented beer) temperature down.
*Note, if you boil half the volume, and top up with water, you may lose hop utilization and also risk thinning out the final product if the boil didn’t convert enough of the sugars. That may result in a less hoppy or lower ABV beer.
Steeping Grains
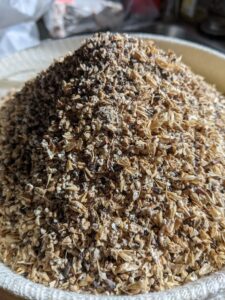
Sometimes an extract kit will have grains for steeping. As per the kit instructions, you need to steep these prior to the boil. They are usually steeped in a gallon of 150 – 156 degrees Fahrenheit water for twenty to thirty minutes. Put the grains in a bag to steep them. After they have steeped, you can pull the bag and let it drain into the pot. Do not squeeze the bag, that can put too many grain proteins and tannins into your wort, which can cause off flavors. If you would like, you can sparge (rinse/pour water over) your grains with a half gallon to one gallon of 155 degrees Fahrenheit water, making sure to get all the wort and fermentable sugars out of the grain, especially since you’ll need more water for the boil, anyway.
Boil
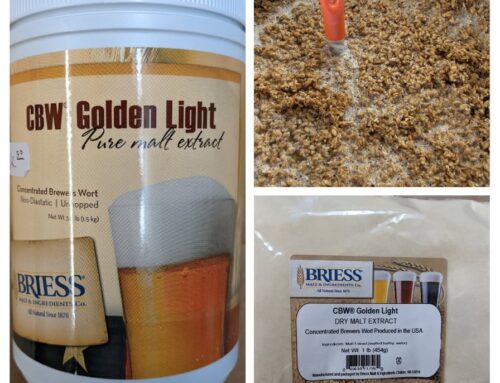
When the grains are done steeping, or if you don’t have anything to steep, bring your wort or water to a boil. Once there is a rolling boil, usually you add the malt extract, then your sixty-minute boiling hops. Here is where I’m gonna stray away from the kit instructions.
If you have grain water that you are starting to boil, once you have a rolling boil, do not add the extract, yet. When overly boiled, malt extracts can get bitter, darker, and can caramelize causing off flavors in your beer. Add your sixty-minute hops at this time. The malt extract can be added later in the boil, like forty minutes in (twenty minutes left in the boil) just to get it incorporated into the brew and sanitized in the boil.
If you are boiling water because you didn’t have any steeping grains, once you have a rolling boil, add one of the malt extracts. If there is dry malt extract, add that at this time, but if there are only cans of liquid extract, add one of those.
To add malt extract, so it doesn’t caramelize or scorch on the bottom of the pot, take the boiling water/wort off the heat completely. Stir the malt extract into the wort, then return it to the heat. Bring it to a boil, again. Once that boil starts, add your sixty-minute hop addition. Do this every time you add malt extract. Stop the clock/timer when you do this, and start it for the remaining boil time once a rolling boil starts again.
When boiling, don’t cover the pot with a lid because the steam will just drip back into the boil and thin out the wort. The only time I use a lid is when I’m steeping the grains to contain the heat.
Boiling Hops
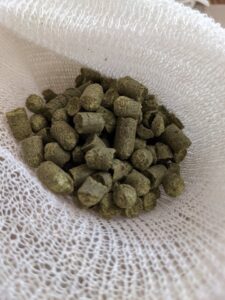
Hop pellets in a bag
Every beer you brew will have at least two to three hop additions, a sixty-minute for bittering, thirty-minute for some bitterness and flavor, and an end of boil addition within the last fifteen minutes for flavor. If you are brewing a kit, there is usually a hop schedule for you to follow. The longer hops are in the boil, the more bitter they will be. The first hop you put in will be in the boil the whole time, you’re layering the hops, so don’t pull any out before the end of the boil.
I say don’t pull any hops out before the end of the boil because I use a muslin hop bag for the hops, so I can see each hop addition bag floating in the wort. Hops turn to mush in the boil, and since I pour, rather than siphon, my wort into a bucket, I don’t want green sludge in the bucket.
End of Boil
At the end of the sixty minute boil an important step comes into play, chilling the wort. This is important because as the wort cools, it will become more susceptible to contamination since it has a lot of sugar for molds and bacteria to consume, and will not be boiled again to kill said mold or bacteria. So, it needs to be cooled down in a timely manner, and anything you use, like a spoon and thermometer needs to be sanitized. I usually put my sanitized stainless steel spoon and floating thermometer in the last minutes of the boil to kill anything that may have landed on it while waiting.
Chilling the Wort
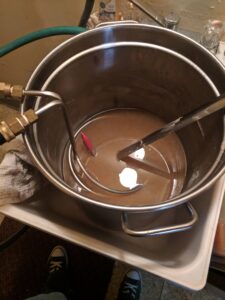
Using in a wort chiller in a utility sink.
To chill the wort, you can use an ice bath or a wort chiller. An ice bath will usually take longer than a wort chiller, but it doesn’t require extra equipment. For an ice bath, fill a sink or container with ice water, place your pot of wort into it, and stir the wort for two minutes, then on and off until it’s below 85 degrees Fahrenheit. Do not put ice into the wort, because it may not be clean. If you did a half boil and know you’ll be topping up with water, you can add cool, clean water to help bring down the temperature as well. The wort chiller is a coil of stainless or copper tubing that you put cool water through with a hose, from a spigot outside or sink, and it cools the coils that are in the beer, and the water exits out of another hose. This does use a lot of water, I try to collect it for the garden since I brew outside.* If you use a wort chiller, I usually put it in the wort at the end of the boil for at least five minutes to kill anything that might be on the chiller in the boil. Be careful, it will spit out any water that is still in it while it’s in the boil, and that water will be hot. Again, stir your wort while chilling it, this will help to cool it down more quickly.
*In the winter, if there is enough snow, I put my pot in a snowbank. It is super effective, especially on windy days. The only thing is to make sure it is always on snow. If it melts the snow down to the muddy ground, mud is an excellent insulator, so your wort will stop cooling and maintain its temperature, adding onto your cool down time. I make sure to put it in a tall snowbank, stirring it, and it’s usually chilled in no time.
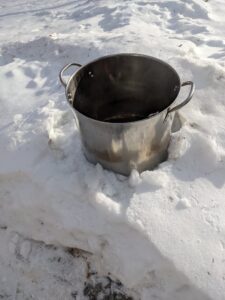
Snowdrifts are great at chilling wort!
Transferring to the Fermenter
When you are done chilling the wort, you may notice that there is a lot of grain protein and hop gunk floating around the pot. You can add that to the fermenter, or you can siphon the wort off of it into a fermenter. I usually just pour the wort from the pot into my primary fermenting bucket. If you are using a carboy for your primary fermenter, you could use a funnel, especially one with a screen, to pour the wort, or siphon into the carboy. I have not run into many problems keeping the proteins and hop gunk in the wort as it ferments, it just means that there will be more stuff to siphon around later on.
If you had a very vigorous boil, you may have lost half a gallon to over a gallon of liquid, bringing you in under the volume you wanted. You can top up the wort with clean water to bring it up to the desired volume, however I would consult a hydrometer first. If you are under volume and under the target specific gravity, then you will just thin the beer out even more with water. But, if you are under volume and the specific gravity is spot on or higher than anticipated, then topping it up isn’t going to change it too much.
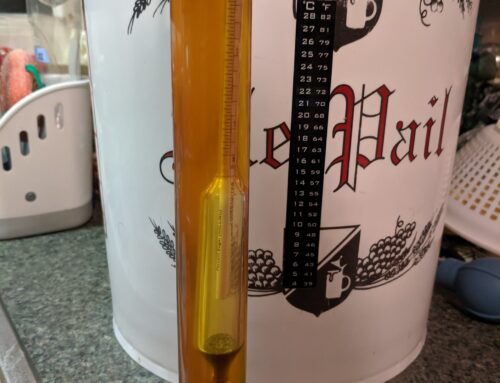
Take a Reading
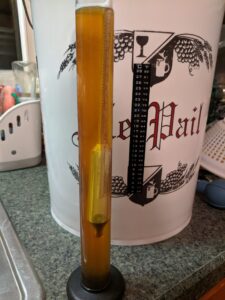
Reading at the end of fermentation
Before pitching the yeast, it is recommended you take a hydrometer reading whether the volume is right or not. The hydrometer reading will tell you the specific gravity and potential alcohol of the wort; this can also be interpreted as having successful sugar conversion in the boil. As stated above, this reading shows whether or not the gravity is where it is supposed to be, and if it is higher you can always thin it out with water. If it is under what it’s supposed to be, don’t fret, the ABV just won’t be as high. Taking the original gravity helps you to know what the final gravity of the beer will be. The hydrometer is also a great tool to show that fermentation is happening, and that fermentation has completed.
Pitch the yeast

Once you have transferred the wort to the fermenting bucket and taken a hydrometer reading, pitch the yeast. If you are using dry yeast, sprinkle it on top of the wort, and don’t stir it in, it will be fine. Do not re-hydrate your yeast, any re-hydration instructions will kill the yeast. If you are using a liquid yeast, make sure it is in date, and room temperature. Lay it out on the counter to warm up while you’re brewing. Pour in the liquid yeast, and again, no need to stir it. If you are using an out of date liquid yeast, you may want to make a starter to get the yeast cells going and to make sure it’s still viable. I’ve never made a yeast starter for dry yeast, it seems to work well without one.
Ferment!
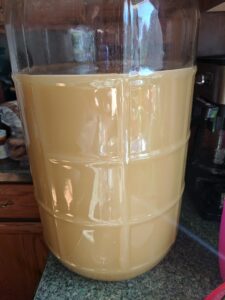
Wheat beer in a carboy
Once the yeast is pitched, put the lid or stopper and airlock on the fermenter, and place it somewhere 68-72 degrees Fahrenheit. Fill the airlock with water or sanitizer. Fermentation should begin in 24 hours, and sometimes sooner. If your fermenter is pretty full, almost to the top of the fermenter, you may want to check out my blow off tube blog, because fermentations can be vigorous and messy if the airlock gets clogged. The primary fermentation will be seven to ten days.
Happy Brewing!
See you in part four where I discuss primary and secondary fermentation.
Caitlin