Time to Ferment!
Your wort has been put into the primary fermenter, yeast has been pitched, and it’s time for fermentation to begin!
Primary Fermentation
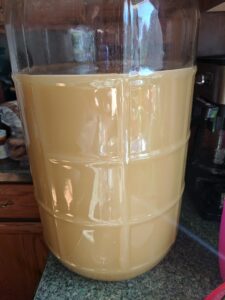
Wheat beer in a carboy
If you are fermenting an ale, place the fermenter somewhere that will be 68-72 degrees Fahrenheit, and if you are using a carboy as your primary fermenter, make sure it isn’t in direct sunlight. For a lager, the fermentation temperature should be 48-55 degrees Fahrenheit. I have found that most dry lager yeasts, such as those in the Fermentis line, will ferment at the warmer ale temperatures and still finish cleanly. Follow lagering instructions if it is a lager.
Ale yeasts are top-fermenting, and lager yeasts are bottom-fermenting, so when fermenting an ale, all signs of fermentation will be more visible on the top of the beer, whereas a lager will be less active on top and may be harder to gauge on looks alone.
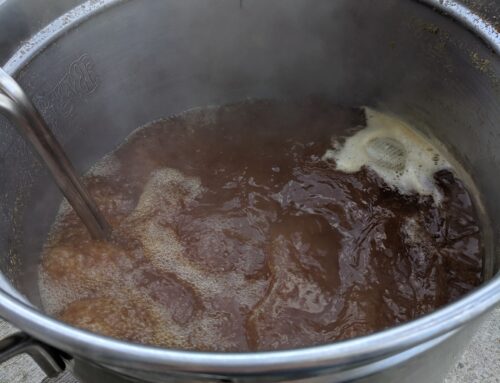
Fermentation should start within 48 hours after pitching the yeast. Once fermentation starts, there will be bubbling in the airlock, and in a carboy with an ale, you will see little bubbles dancing on the top of the beer. If you are fermenting in a bucket and don’t see bubbling in the airlock, make sure the lid is on tightly. Also, if there is a lot of head space on top of the beer, the C02 may not make it to the airlock, but fermentation is probably still happening. On the flip side, if there is not much room at the top of the fermenter, a vigorous ferment may end up in the airlock, clogging it. If this is happening, consider using a blow-off tube, which I discuss in an earlier post, “Avoiding Disaster When Fermenting.” Of course, you will also smell when fermentation is taking place, usually smells extremely yeasty, like a bakery.
What if the Yeast Doesn’t Take Off?
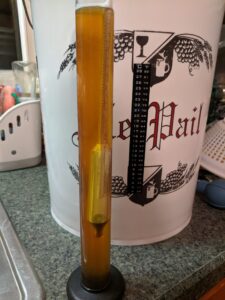
If, after 48 hours, you do not see movement on top of the beer, in the airlock, and/or don’t have the aroma of fermentation, it’s ok to check it. When you open up the bucket, you should see signs of fermentation, like residue on the sides of the bucket, bubbling on the top of the beer if it’s an ale, and again the overwhelming smell of beer and yeast. If those signs are missing, take a hydrometer reading. Make sure all equipment is sanitized when taking a hydrometer reading. This is when knowing your starting gravity is important because you’ll be able to tell if fermentation has occurred by the hydrometer not floating as much and a lower specific gravity reading. If the gravity hasn’t dropped, ensure the room is at the right temperature, ales can be sluggish at 65 degrees Fahrenheit. Next, if the temperature is good, but there is no activity, add yeast nutrients and stir the beer with a sanitized spoon to introduce a little bit of oxygen for the yeast to start reproducing. Let it sit another day or so to see if fermentation has begun. Check it again with a sanitized hydrometer. If it still hasn’t done anything, pitch new yeast; you may want to consider a starter for the new yeast to make sure there are enough yeast cells.
Fermentation Happened as Intended
If the yeast took off during the first 48 hours, as it should, let it ferment completely for seven to ten days. The first three days will be a vigorous fermentation; then, it will slow down significantly near the end of the seven days. You will be able to tell it slowed in fermentation when the bubbling in the airlock isn’t as often, maybe one bubble per minute, and for those fermenting in the carboy, the activity on the top will die down. After seven to ten days, or noticing a slow down in the bubbling, take a hydrometer reading with a sanitized hydrometer. Usually, beers end on 1.009-1.017, depending on the starting gravity. Recipes and kit instructions usually tell you where it should finish. If you are at the suggested final gravity, the beer is done. If you are a few points shy, like two to four, I’d say it’s close enough to being done, but if it’s ten points shy of the final, I’d let it ferment a little longer for a few more days.
The Beer is Done; What Next?
If your beer is done, you can proceed to the priming and bottling step (I’ll discuss this in the next post) or do a secondary fermentation. Some kits require secondary fermentation to add things for flavoring, like hops or spices. I always suggest secondary fermentation for clearing purposes.
Secondary Fermentation
Secondary fermentation is just a fancy way of saying, transfer your beer off the sediment and let it clear or add flavoring adjuncts. Again, you can do your secondary fermentation in a bucket or carboy, your preference. If you are going to add adjuncts, like hops or spices, it will probably be easier to clean those things out of a bucket rather than a carboy.
Siphon the Beer
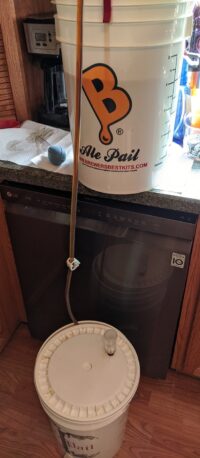
Use a siphon and hose to siphon the beer off the sediment of the primary fermenter into a clean and sanitized bucket or carboy, trying to leave as much of the sediment behind. You never want to pour your fermented product from fermenter to fermenter because it will oxidize and cause off flavors. Once in the new fermenter, you can add a clearing agent (this isn’t necessary because gravity will help clear the beer, but it’s an option for those who want a very clear beer) and add the adjuncts the recipe calls for.
Clearing Agents

Wheat Beer after clearing (Wheat beers are cloudy)
For beer, I generally use gelatin finings as a clearing agent, but you can use clay-based clearing agents, like sparkolloid, or liquid agents, like chitosan and kieselsol. If you use gelatin, soak a teaspoon of finings in a cup of cold water for ten minutes. After transferring the beer into a secondary fermenter, heat the cup of gelatin water to 180 degrees Fahrenheit on the stove. You do not want it to boil because that will dissolve the gelatin, but it needs to be warm enough to be liquid and sticky so the sediment can cling to it. Pour the hot gelatin water into the beer, and stir in with a sanitized spoon. Let it sit for at least a day to settle out any remaining sediment.
Dry Hopping or Adding other Adjuncts (Spices)
If your beer requires dry hopping, either hops or a spice pack, you will do that in the secondary fermentation stage. I usually skip clearing agents in this stage because the beer will usually be sitting an extra seven days, and gravity will help settle any remaining sediment, but you can still add a clearing agent at this time if you’d like.
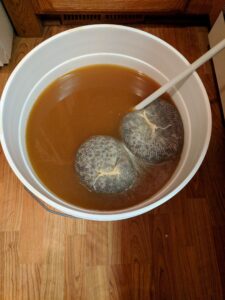
I find it easiest to put dry hopping hops or spices in a muslin hop bag so they aren’t free-floating in the beer. Hops expand when wet and will deposit hop husk debris through the beer, which can clog your siphon; I learned that the hard way. When adding hops or spices in a bag, make sure to sanitize the bag before putting it in your beer! Whether you soak it in Star San, boil it, or dunk it in whiskey or vodka, do something to kill the bacteria that may be on the bag; I have gotten a mold from forgetting to do this! Put your hops or spices in the bag and put the bag in the beer; you can push it down with a sanitized spoon and just let it sit in there the required amount of days; follow the instructions, over spicing isn’t fun!
After the dry hopping stage, pull the bag of hops or spices, and you are ready to move on to the bottling step.
If your beer has flavor extract, this is usually added at bottling because the extracts actually sink. So, if you add the flavoring a few days before bottling, make sure it’s mixed up, or you may have inconsistent flavoring from bottle to bottle; again, I learned that the hard way.
Stay tuned for the next and final part about the bottling process!
Caitlin