A Few More Steps Before Fermentation
You’ve cleaned your fruit, prepared it the way you want to ferment it, and are technically ready to start fermenting. However, there are a few more things you may want to add and do before you pitch that yeast.
Additives
I know many recipes online are more “natural,” in that they use lemons to add acid, and raisins to add tannin into, and that’s fine if you want to use them to add acid and tannin into your wine. But, if you’re like me and don’t want to go to the trouble, or cost, of adding lemons and raisins, there are powdered additives that do the same things and aren’t as costly or time-consuming. These are listed under every recipe in the “Winemaker’s Recipe Handbook.” I want to preface this by saying that these are suggestions, you don’t have to add any of these, but they do make a great product. Here are different additives for wine and what they are used for:
Potassium Metabisulphite
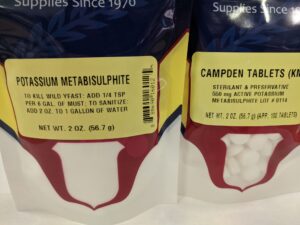
I mentioned this one a few times in previous posts, which is probably the most important of the additives. Potassium Metabisulphite is a sterilant and preservative. It comes in a powder or tablet form called Campden tablets. Potassium metabisulphite is used at the beginning of making wine to sanitize the fruit from bacteria and wild yeast. If you have prepared your fruit for fermenting without using heat, as in keeping it whole, juicing, or even freezing it, it’s best to use potassium metabisulphite before pitching the yeast. That way, any wild yeast or bacteria will be killed and not attack the good yeast you will be adding for fermenting, and also, your wine won’t turn to vinegar or sour from bacteria. That also means you need to wait at least twenty-four hours for the metabisulphite to work and dissipate before adding the good yeast. You can also use metabisulphite as a sanitizer for your equipment. The ratio is two-ounces of the powdered metabisulphite to one gallon of water, and you can put it in a spray bottle and spray out your equipment with it; that’s enough to kill bacteria in your equipment, but not to kill yeast in your wine. It can also be used at the end of the winemaking process as a preservative. A quarter teaspoon of the powder per five gallons is useful to help give your wine a longer shelf life, and not turn to vinegar in the bottle. If you think you will be keeping your wine for longer than a year, I highly recommend adding the metabisulphite a few days before bottling, so it has time to disburse and settle in the wine. I’m not saying that if you don’t use the metabisulphite before bottling, your wine will turn into vinegar, but if there is a bacteria present in the bottle or the air, having the extra metabisulphite in the wine will kill the bacteria and not let it taint the wine.
I know some people may be a bit wary of adding sulphites to their wine, but sulphites are natural byproducts of fermentation, and the extra sulphites you add are a boost to the natural sulphites for maximum preservation. If you think about it, a 1/4 teaspoon in proportion to five or six gallons of wine, you won’t even know the extra sulphites are there.
While I’m talking about post-fermentation, let me quickly talk about another additive for that time,
Potassium Sorbate
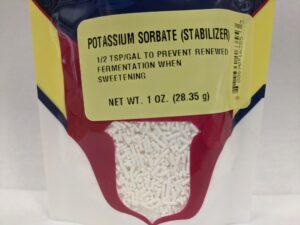
Potassium Sorbate is a stabilizer used at the end of the fermenting process before back-sweetening and bottling. This stabilizes the wine, so there isn’t renewed fermentation if you add more sugar to back-sweeten, or won’t start working after bottling. Potassium Sorbate should not be used on its own because the potassium sorbate may cause a reaction that can make your wine smell and taste like geraniums. Potassium metabisulphite will stop that reaction from happening, so potassium sorbate should be used in conjunction with metabisulphite. The measurement is a one-half teaspoon of potassium sorbate per gallon of wine. I would add it and metabisulphite at the same time, so before back-sweetening, or before bottling if you aren’t going to back-sweeten. If you don’t stabilize before back-sweetening and bottle right away, you may have bottle bombs, and those are a mess!
Potassium metabisulphite can be used alone, it’s just potassium sorbate that needs the metabisulphite to stop the weird reaction.
Back to pre-fermentation additives,
Acid Blend
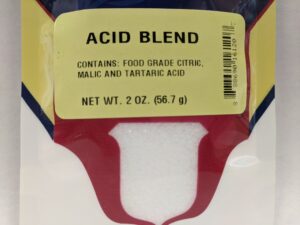
Acid blend is a blend of malic, tartaric, and citric acid, which are naturally present in fruits. It adds acid back into your must (unfermented wine) if the pH isn’t quite right. Acid aids in yeast cell production, preventing off coloring in the juice, and the overall taste and balance of the wine. Most recipes have you add acid blend, or lemons, assuming that the fruit you’re using will be low in acid, which is usually the case. The way to know for sure is to test the must before adding any acid, and I’ll talk about that in the testing section of this post, but what’s listed on recipes is usually a good guideline to go by. Just remember, it’s easier to add acid than it is to take out if you’ve added too much!
Pectic Enzyme
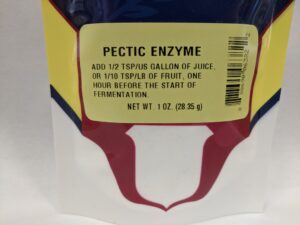
Pectic enzyme eats pectin that is naturally present in fruit and helps break down fruit, improving juice yields. Pectin is usually added to fruit to make jelly/jam, but in wine, the pectin naturally in the fruit can cause what is called a “pectin haze.” This makes your wine look hazy, and may not clear on its own, or even with filtering. Some fruits have little to no pectin, so in those wines, you won’t need to use pectic enzyme unless you want to use it for juice yield, but for those fruits high in pectin, I’m talking peaches or pears, I would use this enzyme. It’s best to add this at the beginning for the juice yield, though I’ve heard from people that it does help get rid of pectin haze after fermentation, but I have not put that to the test, so don’t bank on it and use the pectic enzyme before fermentation!
Tannin
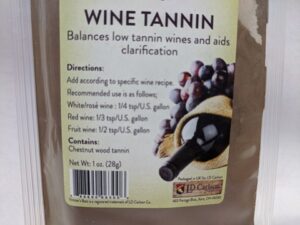
Tannin is usually associated with grapes, but it is also present in oak. It’s what gives wines, especially grape wines, that astringent bite; the sensation makes you want to eat a steak with a full-bodied, dry red wine. Tannin not only helps with the mouthfeel of the wine, but it is a preservative and helps to clear the wine. Recipes usually have tannin added in the form of powder, raisins, or even grape juice. For example, the blueberry recipe from the “Winemaker’s Recipe Handbook” has red grape concentrate added at the end of fermenting for the body, color, and tannin purposes. This one isn’t necessary, but it does help to round out your wine’s balance and flavor.
Yeast Nutrient
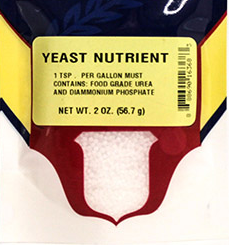
Yeast nutrient is made of urea and diammonium phosphate. These are food for your yeast, that helps with yeast growth. Diammonium phosphate adds extra acid and nitrogen, which yeast likes to multiply, and urea helps to nourish the yeast to ensure it stays healthy throughout the fermentation.
Yeast Energizer
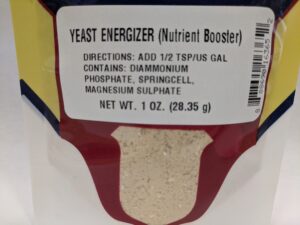
Yeast energizer is diammonium phosphate, spring cell, and magnesium sulphate. This can be used on its own, or as a boost to yeast nutrient. Springcell are yeast hulls, which protect yeast through fermentation and aid in yeast cell multiplication. Magnesium sulphate aids yeast with sugar consumption.
Yeast nutrient and yeast energizer are great at the beginning of fermentation to ensure your yeast will do its job, but also if you encounter a stuck fermentation and need to get it going again.
Testing
There are two steps in the winemaking process that I do that are technically not imperative but are excellent tools to help make a great product and take the guesswork out of your winemaking experience.
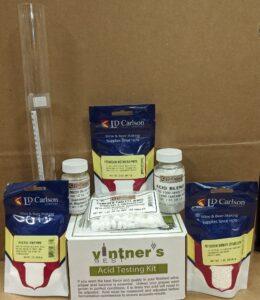
Acid Testing
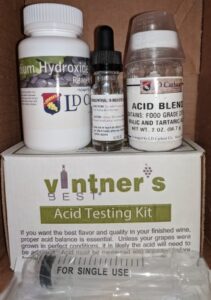
Before you add the amount of acid blend stated in your recipe, you may want to check the acid level and adjust it according to the pH level. As stated in the acid blend section, the acid in wine affects the overall balance and can be harsh if there is too much. Universal pH papers can be used to check acid levels, but they don’t usually have a scale of what the level should be per wine style. That’s why I recommend getting an acid test kit that uses chemistry to check the acid, and lists acid percentages per wine style. Per the acid test kit, take a sample of must, add three drops of phenolphthalein to the sample, then take a syringe full of sodium hydroxide to add to the must/phenolphthalein solution. When the sodium hydroxide is added, a color change occurs, and you add the sodium hydroxide until the color change ceases. However many CC’s of the sodium hydroxide are used, indicates the acid level. One CC is equal to 0.10% of acid, so four CCs is 0.40%. Fruit wines are usually 0.60% acid, and one teaspoon of acid blend per gallon of must will bring acid levels up by 0.15%. Of course, those instructions are all written down in the kit, and I know that it sounds daunting and overwhelming, but it’s a lot less work to check the acid and correct it before fermenting, rather than blindly adding acid blend, and trying to remove/smooth an excess of acid out of the wine at the end.
Hydrometer Testing
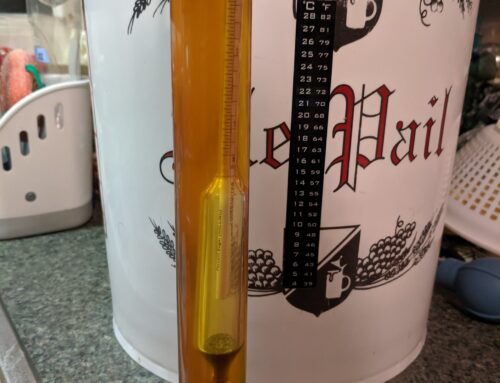
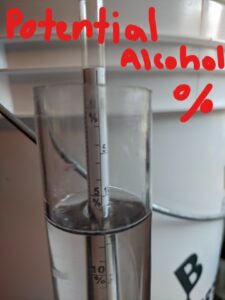
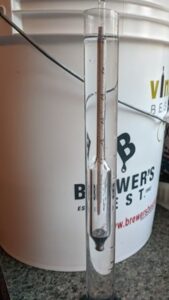
Hydrometers measure your must’s sugar content, which in turn tells you the potential alcohol of your wine. Most hydrometers have three scales, balling/Brix, specific gravity, and potential alcohol percentage. Most recipes use the specific gravity scale, which is the one that reads 0.990 to 1.170, and wines usually start at 1.070 to 1.090, depending on the amount of sugar, and always finish at 0.999 and below. (Pictured below is a hydrometer floating in sugar water, showing the three scales on a triple scale hydrometer)
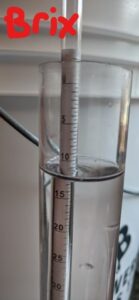
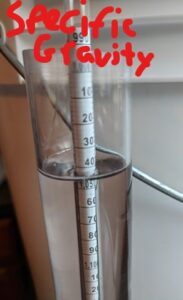
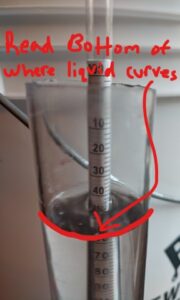
The hydrometer will float due to the sugar, thus showing the specific gravity/potential alcohol based on the sugar level. The reading is read from the bottom of where the liquid dips on the hydrometer and the hash marks on the specific gravity scale are two points. (Pictured below is a hydrometer floating in sugar water, it is a specific gravity of 1.048)
On the triple scale hydrometers, you can read the specific gravity, then turn it to see the potential alcohol percentage in correlation with that gravity. Say your must is 1.070, that’s a potential of at least eight percent alcohol on the potential alcohol scale. Hydrometer readings are accurate when the must is sixty degrees Fahrenheit. If it’s warmer than sixty degrees, to correct the reading, you will have to add a few points to the gravity reading; there is a paper included with the hydrometer that tells you how many points to add per degrees warmer. Usually, it’s a point per ten degrees, so eighty degrees would be two points added to the gravity.
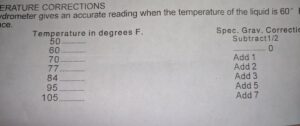
Temperature correction section on paper that comes with hydrometers
From there, if you are happy with that gravity, you can pitch your yeast and start fermenting, or if you would like a higher gravity/potential alcohol, you can add more sugar until you get the potential you want. The only gravity readings that matter are the starting gravity before pitching the yeast, and the final gravity, so mark them down. After fermentation begins, the hydrometer becomes a tool to check that fermentation is happening. As the sugar is eaten and converted into alcohol by the yeast, there will no longer be anything for the hydrometer to float on, so it will sink, causing the specific gravity to decrease, which is what you want.
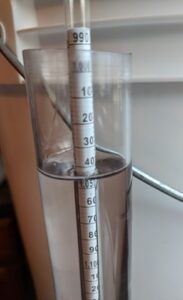
Hydrometer in plain water.
Your wine will be done fermenting when the specific gravity reaches 0.999, showing that there is no more sugar for the hydrometer to float on, which in turn means no sugar for the yeast to eat. To approximate your wine’s alcohol percentage, take your starting gravity minus your final gravity, then multiply that difference by 0.129, and you’ll get an approximated percentage based on the specific gravities.
For example, 1.070 -0.999 = 0.071 X 0.129 = 0.009159, move the decimal over three, 9.159% alcohol.
Now that you’ve treated your must with the additives you wanted, tested and corrected the acid level, and tested and recorded the starting gravity, you are ready to pitch your yeast and start fermenting! Stay tuned for the next part of the winemaking guide, fermentation.
-Caitlin