Where to Begin?
Are you interested in starting to brew your own beer, but don’t know where to begin? In this multi-part guide, I will discuss the basics of homebrewing and share my tips and tricks for brewing beer at home.
Equipment

One of the most important parts of brewing, or fermenting anything, is equipment. You need a fermenter, siphoning equipment, boiling pot, bottles, cappers, and caps. There are equipment kits available, but you can always buy your equipment separately, and just get the essential pieces for brewing.
Fermenters
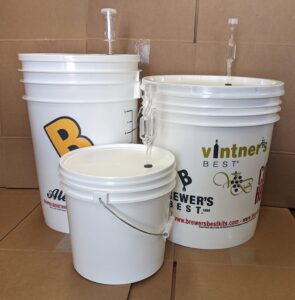
Most beginner ingredient kits make one gallon or five gallons of beer, so I would recommend having a fermenter with at least a half-gallon of space above those volumes. Fermenting in buckets is a good idea because they usually offer enough headspace for fermentation and are easier to clean; beer creates a lot of debris in the ferment. Based on the bucket sizes available, I’d recommend using a 2-gallon bucket for a one-gallon batch, a 6.5-gallon bucket for a five-gallon batch, and a 7.9-gallon bucket for a six-gallon batch.
I know some people prefer fermenting in glass, so they use a carboy; this also allows you to watch the fermentation take place. If you would like to ferment in a carboy, make sure to leave some space at the top so there is room for the fermentation. If your bucket or carboy is too full, it could bubble up into the airlock, clogging it and causing the lid or stopper to blow, leaving behind a mess.

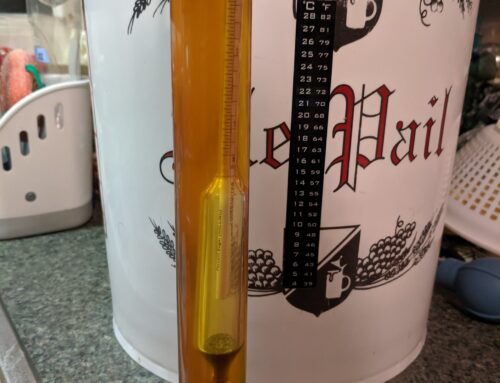
I recommend closed, anaerobic fermentation, so bacteria, mold, and bugs don’t land on your beer. Make sure to have a tight lid and airlock on your bucket or a stopper and airlock on your carboy. Airlocks filled with water make it so CO2 produced during fermentation can be released, shows that fermentation is happening with bubbling in the airlock, and keep bugs out of your beer.
Siphoning Equipment
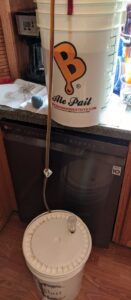
After your beer has fermented, you may want to transfer it into another fermenter before bottling, either for secondary fermentation, for clearing, or for adding other ingredients, like hops or flavorings. Siphoning is recommended rather than pouring anything that has been fermented because if you pour it from fermenter to fermenter, it could put too much oxygen into your product and oxidize it, which can cause off-flavors. You can use a hose, a racking cane with a hose, or an auto-siphon with a hose to siphon your beer. Also, use these to siphon the beer into bottles, and add a bottle filler for ease of filling bottles!
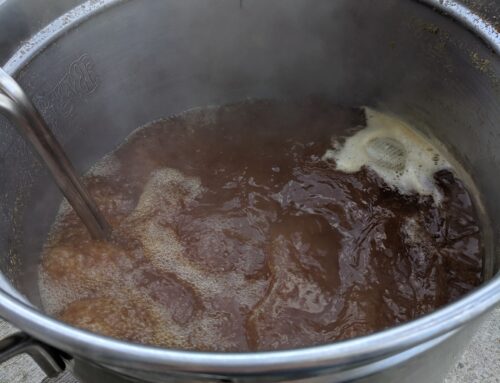
Boiling Pot

For beer, you need a stainless steel brewing pot because the hops are highly acidic and if you use an aluminum pot, over time the acid can break down the aluminum, which is not ideal. A five-gallon stainless steel pot is a good place to start, especially if you are going to be brewing a beer with mostly malt extract and not all-grain, you can boil 2.5 gallons, and at the end, top the rest up with clean water to make 5 gallons. If you want to brew an all-grain batch, you’re going to need a bigger pot because when brewing all-grain you should at least boil the volume you want to end up with, so for five gallons an eight gallon or higher volume pot would be best.
Bottles
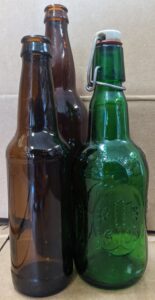
To bottle your beer you need bottles that can be capped and will hold the pressure of carbonation. Returnable, pry-off bottles are perfect for reusing because crown caps work best with them. I wouldn’t recommend twist-off bottles because the caps have a hard time crimping over the threads, and may not seal, which means the CO2 can escape and not go into your beer. You can also use flip-top bottles. There are 12oz and 22oz pry-off, and 16oz and 1L flip-top bottles available, but be cognizant of how much beer you want to drink at a time because the carbonation won’t last forever, so once you open a bottle you pretty much have to drink it all.
Cappers and Caps
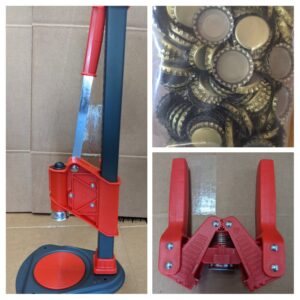
You need a way to put caps on your bottles, there is a double lever hand capper or a bench capper. What you purchase is personal preference, both use leverage to crimp caps over the lip of the bottle, and if you buy an equipment kit a double lever hand capper is usually included. The caps used are crown caps, now with oxygen barrier rings for a better seal. Caps can be purchased in 144 count packages, but some ingredient kits, like Brewer’s Best, come with the caps you need per batch.
Cleaning and Sanitizing
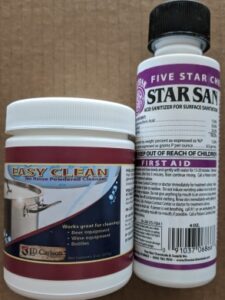
The most important thing to ensure successful brewing is cleanliness! If you clean/sanitize your equipment before you start and after you’re done, you shouldn’t have nasties, like mold and bacteria growing on your equipment, which can ruin the beer. For cleaning, I recommend a no-rinse cleanser, like Easy Clean. It is an oxygen-based cleanser that doesn’t foam/suds but gets the job done, and soaks labels off of bottles, molds out of the bottom of bottles, and does wonders on coffee pots. Easy Clean is only a cleanser, though, so you may want to use a sanitizer in addition, especially because airborne mold likes beer and can stay in your buckets infecting future batches! Star San is an acid-based, no-rinse sanitizer that takes two minutes of contact time to kill bacteria, and may foam, but the foam also sanitizes. Just spray Star San on all of your clean equipment, let it sit for two minutes, and you’re ready to go!
If you want to keep a bulk Star San solution around, (I keep a gallon mixed up at a time in a glass jug), because it is acid-based, you need to put it in distilled water since the minerals in tap water can neutralize the acid. It’s a ¼ tsp per 24 ounces in a spray bottle or 1 ¼ tsp per gallon of distilled water. I check the acid level with pH paper test strips every month to make sure it’s still a two or three on the pH scale; that’s when it is most effective.
Stay tuned for part two in which I discuss ingredients, and part three the brewing process!
-Caitlin